Crispy Coconut Shrimp: Deep Fry, Air Fry, or Oven Bake?
The delightful crunch of golden-brown coconut meeting the succulent sweetness of perfectly cooked shrimp is a culinary experience cherished by many. Coconut shrimp, with its aromatic, slightly sweet, and undeniably crispy crust, has earned a place in appetizer menus and home kitchens worldwide. While its exact origins remain a delicious mystery—some speculate Caribbean, others Polynesian, and many credit the innovative spirit of American tiki bars—its universal appeal is undeniable. From upscale restaurants to casual pubs, this tropical-inspired treat consistently satisfies cravings for something exotic, comforting, and utterly delicious.
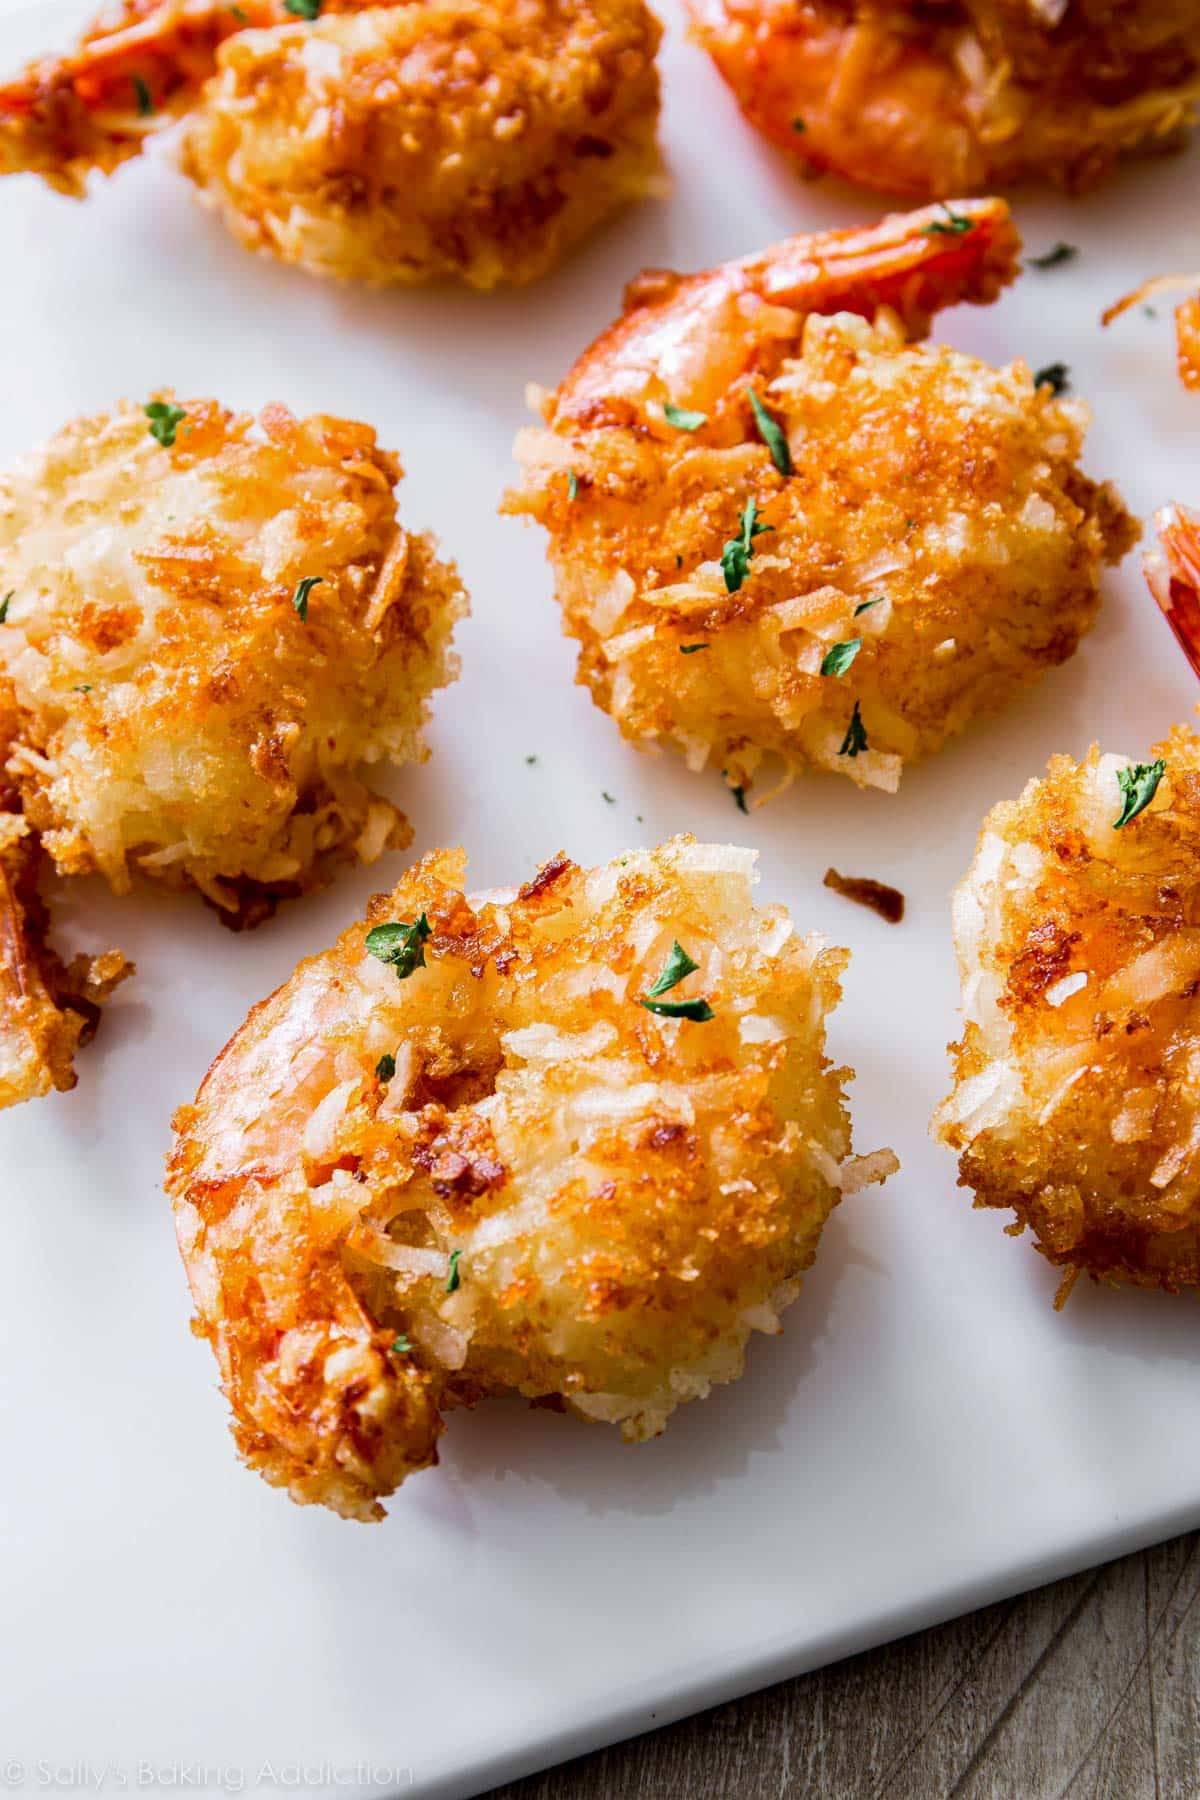
At its heart, crispy coconut shrimp is deceptively simple: take the familiar concept of breading and replace traditional crumbs with a generous layer of dried, shredded coconut. However, achieving that ideal balance—a thick, intensely aromatic and crunchy exterior that gives way to a juicy, tender shrimp without any hint of rubberiness—requires a few key techniques. But which cooking method reigns supreme for ultimate crispness, and can you achieve similar results with healthier alternatives?
The Allure of Perfectly Prepared Coconut Shrimp
What makes a truly outstanding coconut shrimp? It's the symphony of textures and flavors. Imagine that first bite: a robust, audible crunch as your teeth break through a thick, golden crust, releasing the sweet, nutty aroma of toasted coconut. This gives way to the tender, moist, and perfectly seasoned shrimp inside, never dry or tough. The contrast is paramount – a well-executed coconut shrimp avoids a flimsy coating or an overcooked center.
To consistently hit this mark, the choice of shrimp is paramount. We recommend using large shrimp, specifically those labeled as 12/15 count per pound. While size labels like "jumbo" or "colossal" can vary and are often unregulated, checking the count-per-pound ensures you get the right size. Why does size matter so much? Smaller shrimp cook through too quickly, becoming rubbery long before the coating has a chance to crisp up to perfection. Larger shrimp provide a more forgiving cooking window, allowing the breading to develop its texture while the interior remains juicy. For more in-depth advice on selecting your shrimp and perfecting your breading, be sure to check out our guide on Unlock Perfect Coconut Shrimp: Jumbo Size & Secret Breading Tips.
Mastering the Classic: Deep Frying Coconut Shrimp
For the purists and those chasing the quintessential crispy experience, deep frying is the traditional and often most rewarding method. It delivers an unparalleled golden-brown crunch and richness that's hard to beat. The key to deep-fried success lies in a meticulous breading process and careful temperature control.
The Breading Procedure for Deep Frying:
- Preparation: Start with peeled and deveined jumbo shrimp. For convenience and a handy "handle," leave the tails on and make sure they are thoroughly cleaned.
- First Dredge (Flour): In a shallow dish, combine all-purpose flour, possibly with a hint of garlic powder and a pinch of salt and pepper. Dredge each shrimp in this mixture, ensuring an even coating and shaking off any excess. This creates a dry surface for the egg wash to adhere to.
- Egg Wash (with a Twist): In a second shallow dish, beat eggs. For an even thicker and crisper coating, whisk in a couple of tablespoons of flour into the egg mixture. This creates a slightly more viscous batter, allowing more coconut to adhere. Another exciting variation is using a beer batter, combining all-purpose flour, egg, beer, and a touch of baking powder for an exceptionally light and crispy shell.
- Final Coat (Coconut & Panko): In a third shallow dish, combine unsweetened shredded coconut flakes with panko-style breadcrumbs. The panko is a secret weapon here, adding an extra layer of textural crispness that elevates the standard coconut crust. Dip each egg-coated shrimp into this mixture, pressing gently to ensure the coconut adheres firmly. Season lightly with salt and pepper again.
Deep Frying Tips:
- Oil Choice: Use a neutral cooking oil with a high smoke point, such as peanut oil or vegetable oil.
- Temperature Control: Heat your oil to 350-375°F (175-190°C). Maintaining a consistent temperature is crucial for even cooking and a golden finish without oil saturation.
- Don't Overcrowd: Fry in small batches to prevent the oil temperature from dropping too drastically, which can lead to greasy shrimp.
- Cooking Time: Deep fry for 2-3 minutes per side, or until golden brown and the shrimp is opaque throughout.
Healthier Alternatives: Air Frying & Oven Baking
While deep frying offers the ultimate crunch, air frying and oven baking are fantastic alternatives for those seeking a lighter option without sacrificing too much crispiness. With a few adjustments, you can still achieve wonderfully golden and delicious coconut shrimp.
Air Frying Coconut Shrimp:
The air fryer has revolutionized healthier "frying," and it's particularly effective for coconut shrimp. It circulates hot air, creating a crispy exterior with minimal oil.
- Preparation: Follow the same breading procedure as for deep frying (flour, egg, coconut/panko).
- Oil Spray is Key: Lightly spray the coated shrimp with cooking spray or brush with a thin layer of oil (e.g., avocado or olive oil). This helps achieve that desired golden-brown color and crisp texture.
- Arrangement: Arrange the shrimp in a single layer in the air fryer basket, ensuring they don't touch. You'll likely need to work in batches.
- Temperature & Time: Air fry at 375-400°F (190-200°C) for 8-12 minutes, flipping halfway through. Cooking times can vary based on your air fryer model and shrimp size, so keep an eye on them. They should be golden brown and cooked through.
Oven Baking Coconut Shrimp:
Oven baking is another excellent method that yields a respectable crisp, especially when done correctly. It's a hands-off approach that’s perfect for larger batches.
- Preparation: After breading, place the shrimp on a parchment-lined baking sheet. Parchment paper prevents sticking and aids in even cooking.
- Oil Spray is Key: Similar to air frying, a light spray or brush of oil over the coated shrimp is essential for crispiness and color.
- Temperature & Time: Preheat your oven to 400-425°F (200-220°C). Bake for 12-18 minutes, flipping the shrimp halfway through. The higher heat helps achieve a crispier crust. Again, look for a golden hue and opaque shrimp.
While air-fried and oven-baked coconut shrimp may not have the exact same deep-fried richness, they offer a satisfying crunch and retain the wonderful flavor profile, making them excellent choices for a lighter meal or appetizer.
The Perfect Accompaniment: Dipping Sauces and Sides
No plate of crispy coconut shrimp is complete without a tantalizing dipping sauce. The right sauce elevates the dish, offering a contrasting flavor that complements the sweet and savory notes of the shrimp.
- Sweet Chili Sauce: A classic for a reason. Often inspired by Thai nam prik pao, it typically features dried chilies, palm or brown sugar, vinegar, garlic, and fish sauce. Its balance of sweet, spicy, and tangy notes is a perfect match.
- Fruity & Tangy Options:
- Orange Dipping Sauce: A sweet and savory blend, perhaps with marmalade, mustard, and horseradish for a delightful kick.
- Mango Salsa: Fresh, vibrant, and bursting with flavor, a mango salsa provides a bright, acidic counterpoint that cuts through the richness of the fried shrimp.
- Creamy & Rich Choices: Traditional tartar sauce or a creamy, zesty lime mayonnaise can also be delicious.
For more creative and diverse options that will truly enhance your coconut shrimp experience, explore our article on Beyond Sweet Chili: The Best Dipping Sauces for Coconut Shrimp.
Beyond the sauce, consider pairing your coconut shrimp with light and complementary side dishes. A simple jasmine rice, a refreshing green salad with a citrus vinaigrette, or some lightly steamed or roasted vegetables can complete the meal beautifully without overpowering the star of the show.
Pro Tips for Coconut Shrimp Success
- Unsweetened Coconut: Always opt for unsweetened shredded coconut flakes. Sweetened versions can burn more easily and make the shrimp overly saccharine.
- Pre-Coating Prep: After breading, place the shrimp on a parchment-lined baking sheet and refrigerate for at least 15-30 minutes. This helps the coating adhere better during cooking, preventing it from falling off.
- Storage: Leftover coconut shrimp can be stored in a shallow, airtight container in the refrigerator for up to three days.
- Reheating: For best results, reheat leftover coconut shrimp in a preheated oven or air fryer at around 350°F (175°C) until crispy and warmed through. Microwaving can make the coating soggy.
- Freezing: You can freeze cooked coconut shrimp for up to three months. Flash freeze them on a baking sheet until solid, then transfer to a freezer-safe bag. Reheat from frozen in the oven or air fryer for a convenient meal.
Whether you choose the indulgent deep-fried route, the healthier air-fried option, or the convenient oven-baked method, achieving crispy, juicy coconut shrimp is well within your grasp. By paying attention to shrimp size, mastering the breading technique, and complementing it with the perfect sauce, you can create a culinary masterpiece that transports you to a tropical paradise with every bite. So, gather your ingredients, pick your preferred cooking method, and get ready to enjoy this irresistible treat!
